

Create Your Own Client Portal Free
Most businesses do not start by looking for client portal software.
They start with email.
Then come Google Drive folders, WhatsApp messages, spreadsheets, shared links, project boards, and long threads where nobody is quite sure which file is the latest version.
At first, it feels manageable.
Then a client asks you to resend a document you already sent. Someone uploads a sensitive file into the wrong place. Your team has to search through five tools to find one update. A client asks, “Can other clients see this?” And suddenly the old setup does not feel professional enough anymore.
That is usually when people start looking for a better way to manage client work.
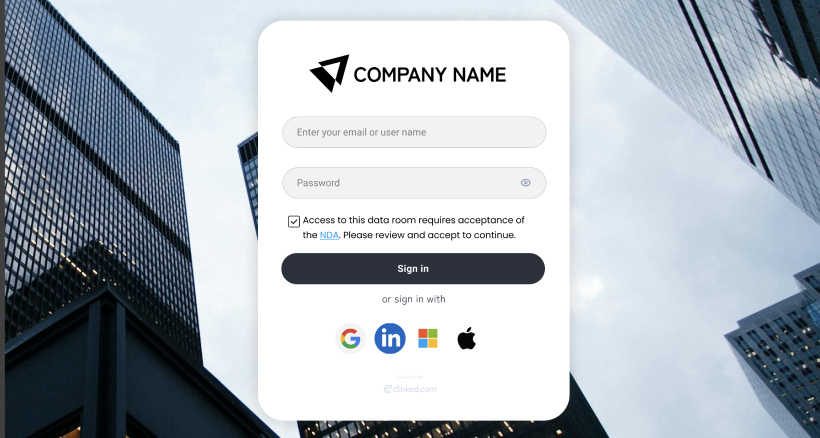
A client portal gives every client one secure place to access files, upload documents, read updates, and communicate with your team. With Clinked, you can create your own client portal during a 14-day free trial, test it with your team, and decide whether it is the right fit before moving to a paid package.
Quick answer: can you create your own client portal for free?
Yes. You can create a basic client portal for free using tools like Google Drive, Notion, spreadsheets, templates, or no-code builders.
But free DIY portals usually work best for simple file sharing. They often lack secure client login, branded workspaces, proper permissions, audit trails, document requests, and a professional client experience.
If you want to create a secure, branded client portal without building everything manually, Clinked gives you a 14-day free trial so you can set up your portal, invite users, share files, and test the experience before choosing a paid plan.
skip to How to build a client portal step by step
What is a client portal?
A client portal is a secure online workspace where a business gives each client private access to files, messages, updates, document requests, and shared resources.
Unlike email or shared folders, a client portal keeps each client’s information separate and gives the business more control over access, branding, permissions, and communication.
For example, Google Drive is useful for storing and sharing files, and Google’s own product page describes Drive as cloud storage for file sharing and collaboration with customizable permissions such as edit, comment, and view. Google Drive
But a shared folder is not the same as a full client portal. A client portal is built around the client relationship, not just file storage.
A client portal can be used to:
- share files and documents
- collect client uploads
- send project updates
- manage client conversations
- share reports
- request approvals
- organize onboarding
- control who can see what
- give clients a professional self-service experience
The purpose is simple: clients should not have to search through old emails, shared links, and message threads to find what they need.
A good client portal becomes the single place for everything important in the client relationship.

Why businesses look for client portals
The most common reason is not “we want another tool.”
It is usually something more practical:
“We’re using email right now, and it’s getting messy.”
That problem shows up again and again in client-facing businesses. Email is fine for quick messages, but it becomes risky when you use it to manage contracts, sensitive documents, approvals, reports, onboarding files, and long-term client communication.
Businesses usually start looking for a client portal when they are dealing with:
- files buried in email threads
- clients asking for the same document again
- sensitive files sent through email, WhatsApp, or Slack
- no clear audit trail
- Google Drive folders with messy permissions
- clients unsure where to upload documents
- team members using different tools
- no branded client experience
- clients who are not tech-savvy
- no central place for updates and approvals
A client portal fixes this by giving clients one secure workspace instead of forcing them to piece together information from email, shared folders, chat, and spreadsheets.
Built for growing businesses, not just big enterprises
A professional client experience should not be something only large enterprises can afford.
Small businesses, startups, consultants, and growing teams also need to look organized. They also need to protect client documents. They also need a simple way to give clients one secure place for files, updates, and communication.
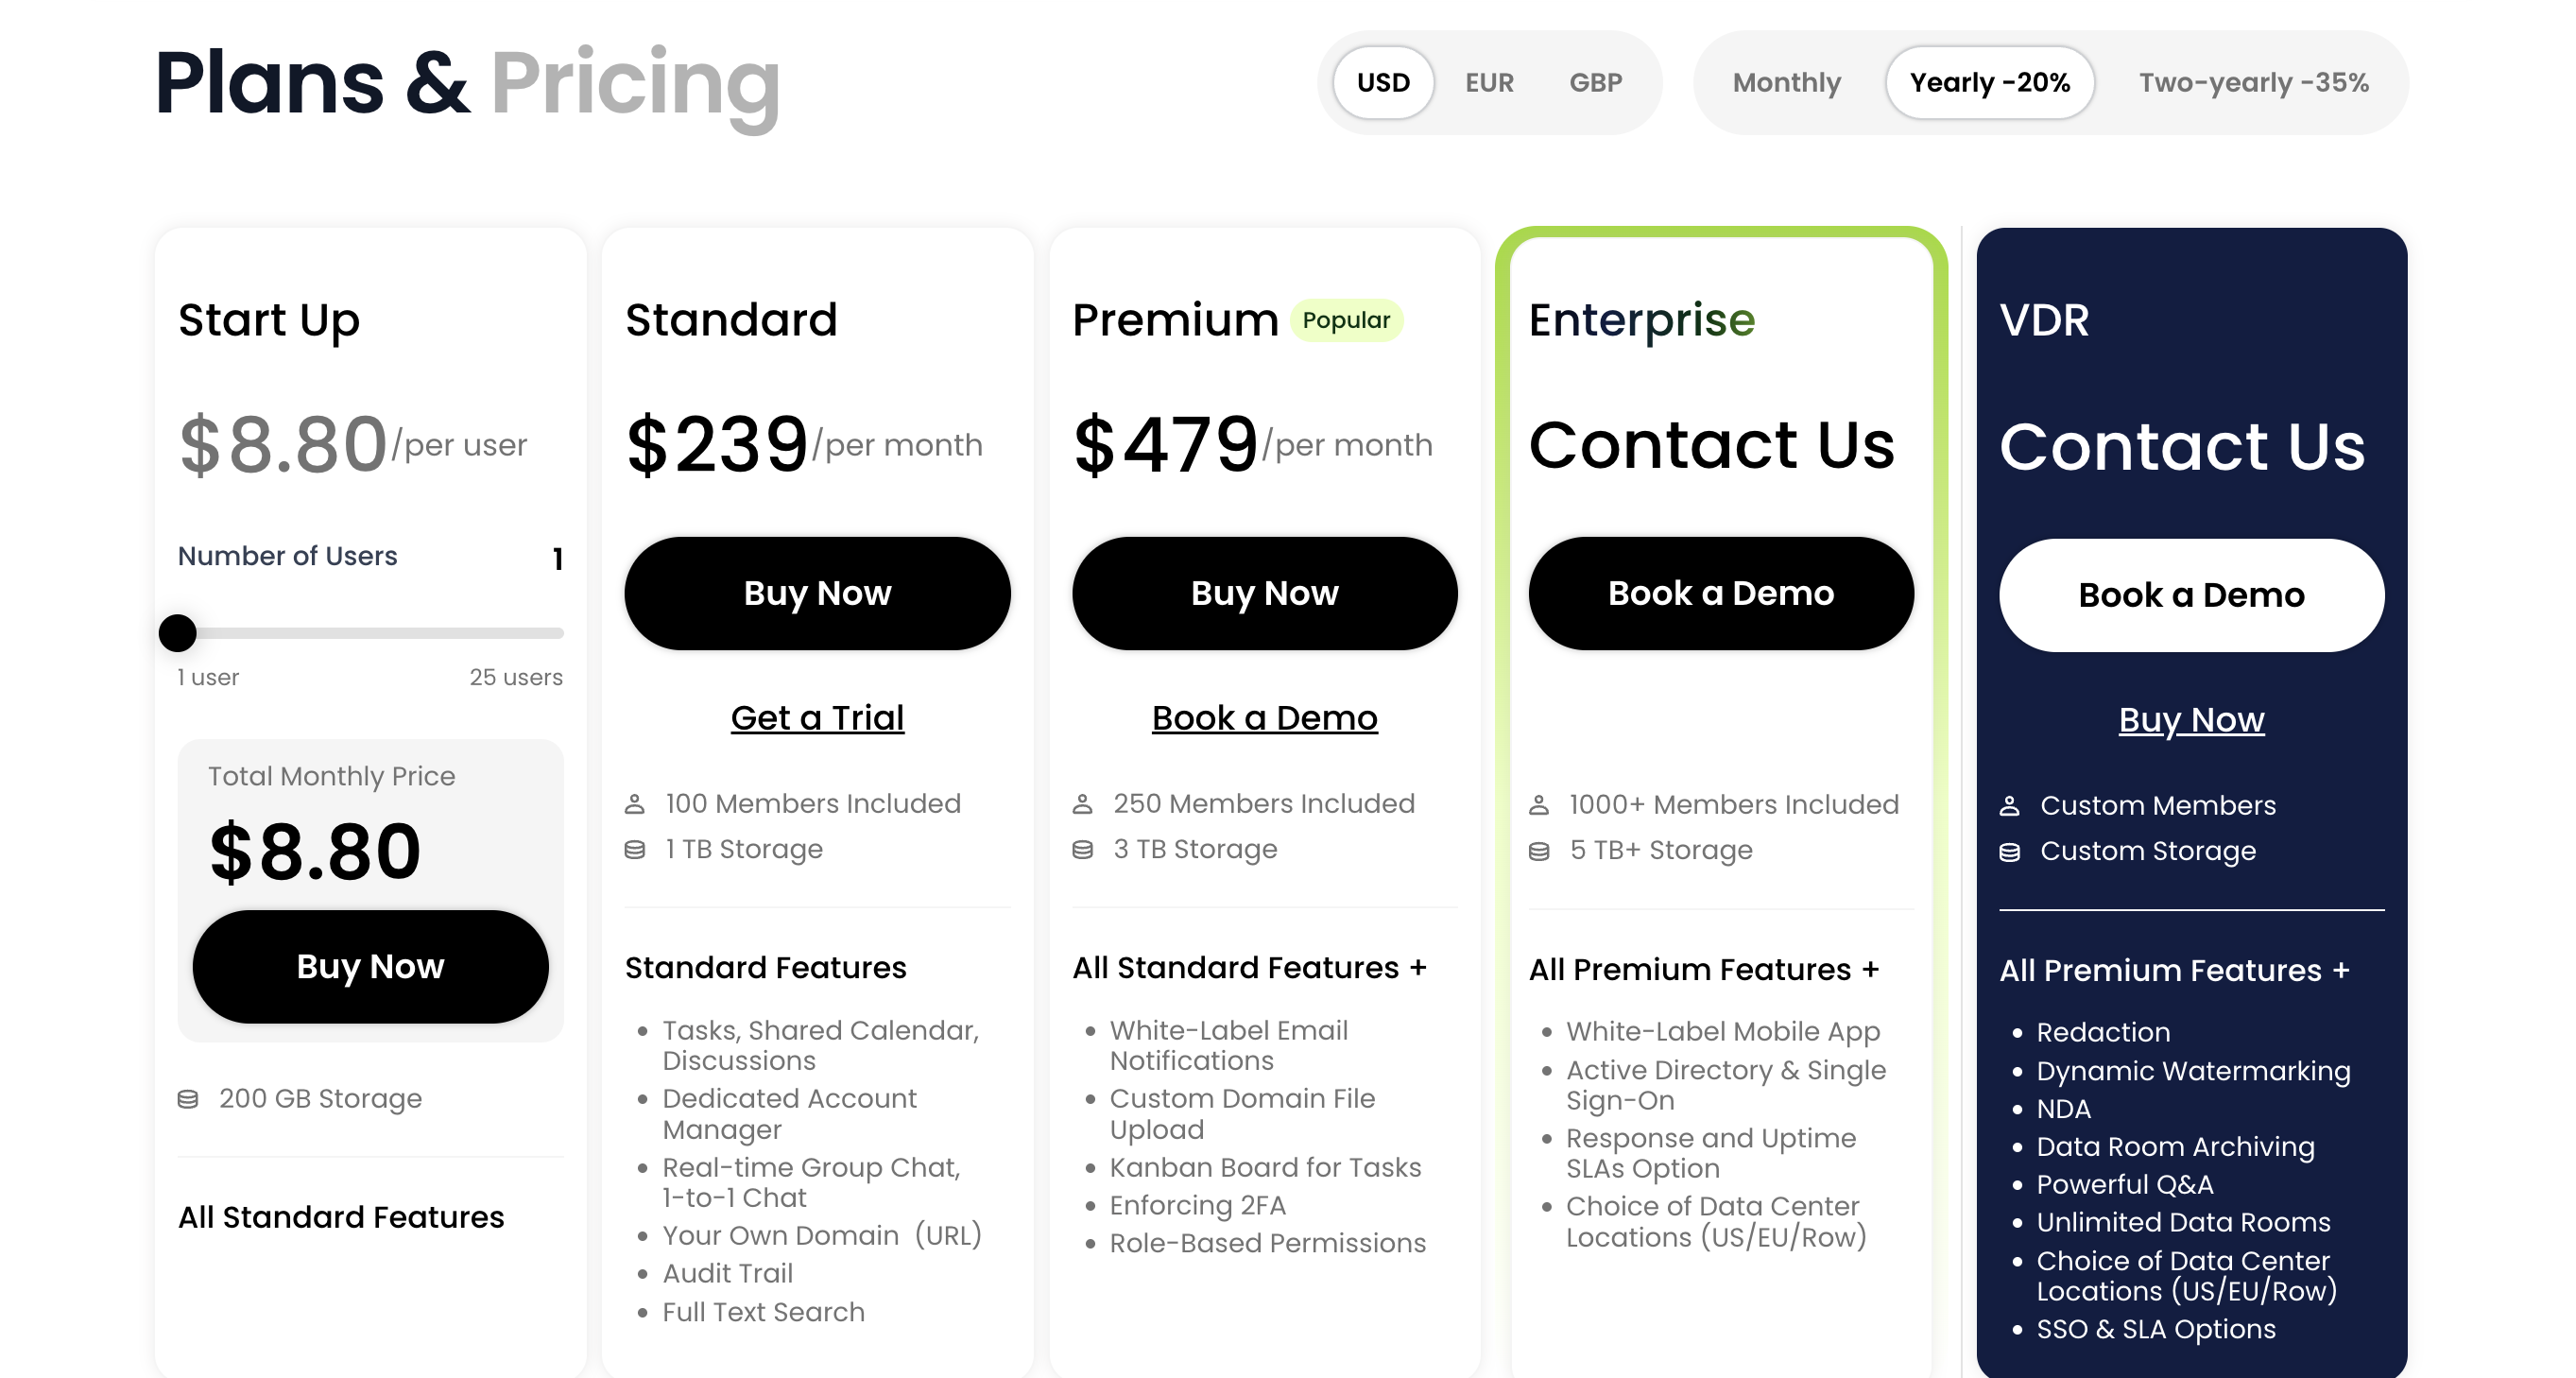
That is why Clinked introduced the Start Up package.
It gives smaller teams a more accessible way to move away from messy email threads, shared folders, and scattered tools without jumping straight into an enterprise-level setup.
With the Start Up package, teams can create a secure, branded client portal from $8.80 per user/month.
For a small business, that can mean:
- fewer lost files
- fewer repeated client questions
- a more professional first impression
- better client onboarding
- secure document sharing
- one place for every client relationship
Client satisfaction should not depend on company size. Whether you are managing five clients or five hundred, your clients still deserve a clear, secure, and professional experience.
Best way to create a client portal
The best way to create a client portal is to start with a simple structure: one private workspace per client, clear folders for documents and uploads, secure permissions, branded access, client notifications, and a repeatable process for updates and communication.
Small businesses can use free tools for basic file sharing, but dedicated client portal software is better for secure, client-facing collaboration.
If your main goal is basic document storage, Google Drive or shared drives may be enough. Google describes shared drives as team-owned spaces for storing, searching, and accessing files. Google Workspace Shared Drives
If your goal is to give external clients a secure, branded place to work with your business, a client portal is usually the better fit.
DIY tools can work when the need is simple.
But most DIY setups break down when you need secure access, client isolation, branding, auditability, document collection, and a proper client-facing experience.
Free client portal vs professional client portal
Who this guide is best for
This guide is best for businesses that:
- manage multiple clients
- share sensitive documents
- want a branded client experience
- collect files from clients
- need separate client workspaces
- want to reduce email back-and-forth
- need a better way to manage onboarding
- want clients to have one place for files, updates, and communication
This includes agencies, consultants, accountants, legal firms, financial services teams, healthcare teams, HR providers, property businesses, startups, and other client-facing service companies.
How to create your own client portal with Clinked
Here is a simple way to set up your portal with Clinked.
Step 1: Start your 14-day free trial
Create your Clinked account and start the free trial.
Use the trial to test the real portal experience: branding, client workspaces, file sharing, permissions, communication, and client access.
Step 2: Add your branding
Add your company logo, colors, and brand details.
This makes the portal feel like an extension of your business instead of a generic shared folder.
For many clients, this matters. A branded portal tells them there is a proper process behind the service. If you are confused talk to clinked at : sales@clinked.com They will set it up for you in mintutes.
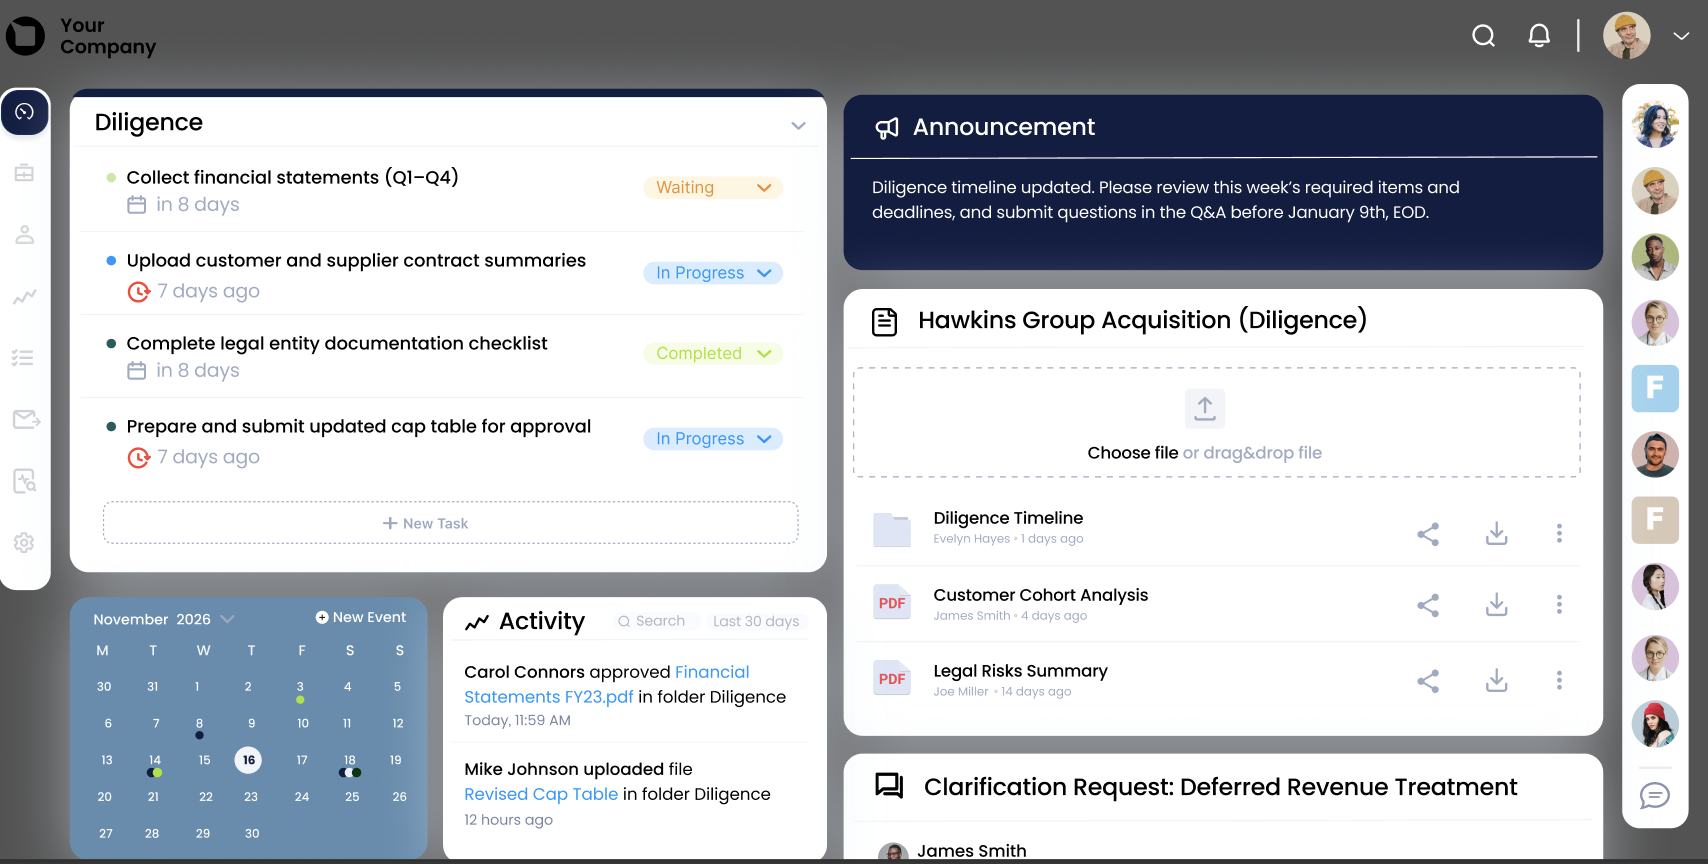
Step 3: Create a workspace for each client

Create a separate workspace or group for each client.
This keeps information organized and prevents documents, messages, and updates from getting mixed together.
For example:
- Client A onboarding
- Client B monthly reports
- Client C project documents
- Client D financial records
This also answers the client isolation concern clearly: every client gets their own space.
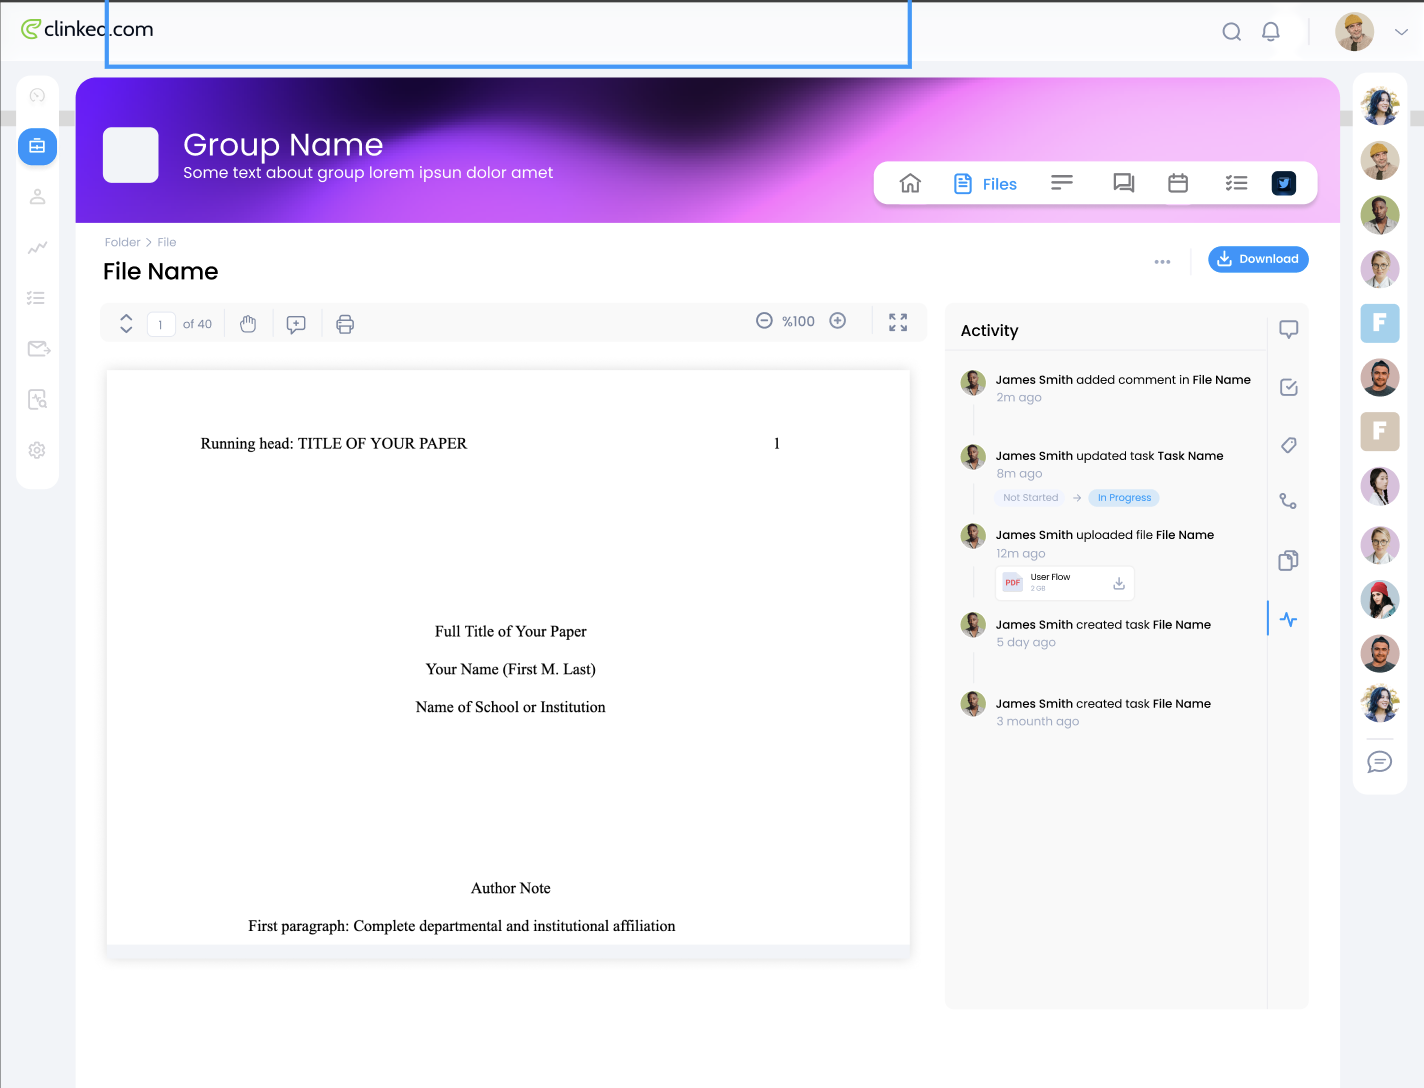
Step 4: Upload your key document
Add the files your client will need most often.
This could include:
- welcome documents
- contracts
- proposals
- reports
- invoices
- service agreements
- project plans
- meeting notes
- brand guidelines
- shared resources
Use simple folder names, such as:
- Welcome
- Contracts
- Project Files
- Reports
- Invoices
- Client Uploads
Do not make clients guess where things are.
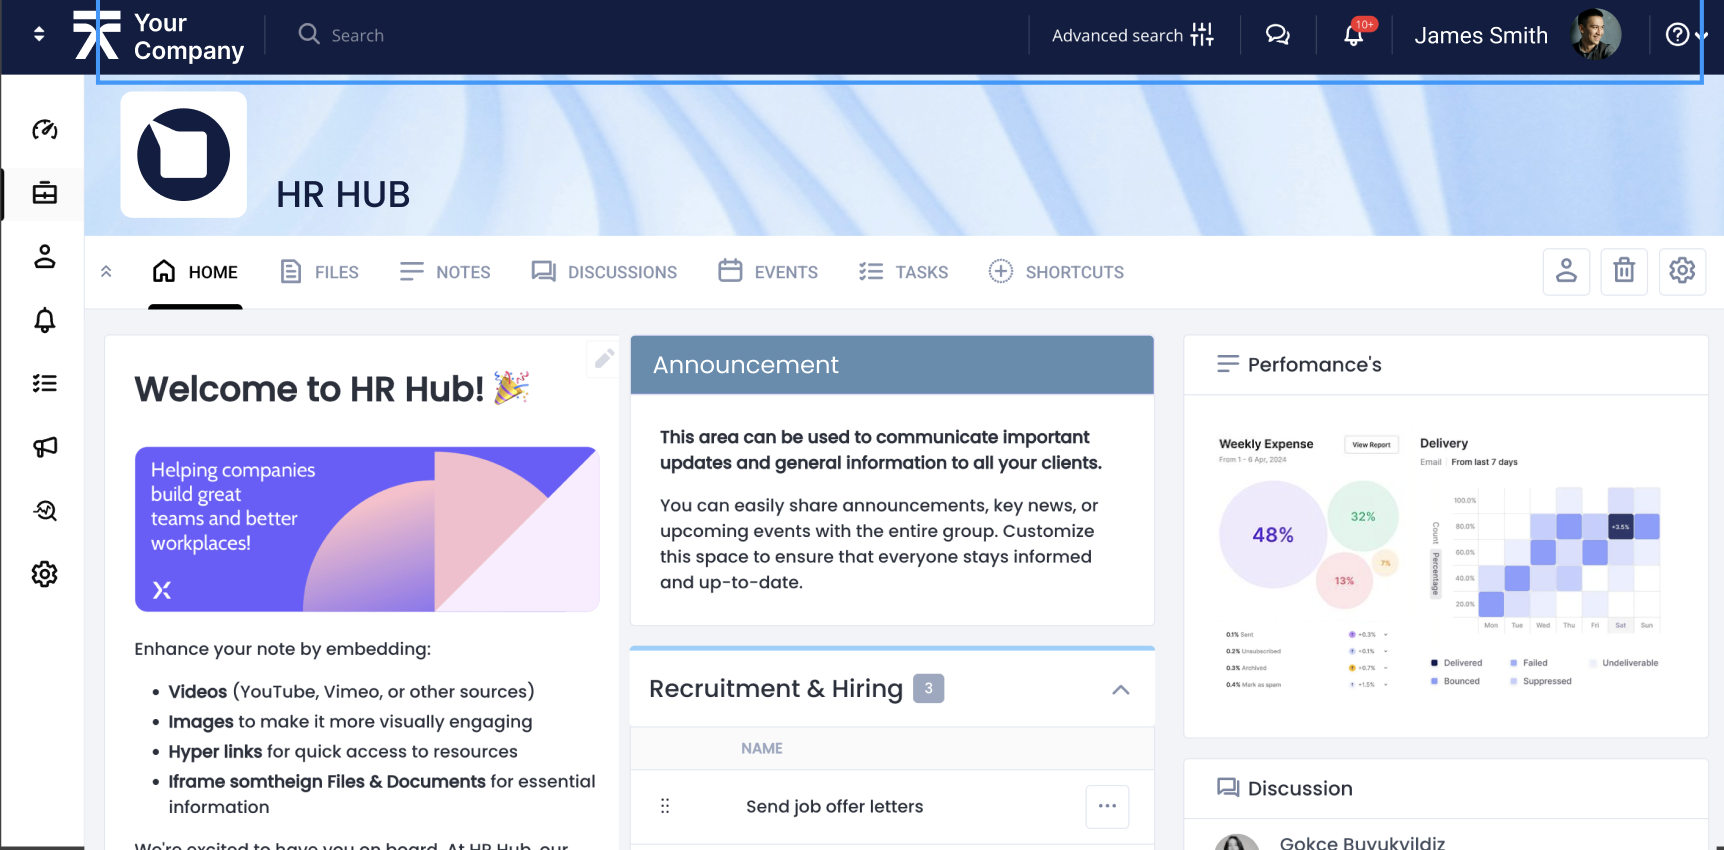
Step 5: Add conversations and updates
Once your files are in place, use the portal for important client communication.
Instead of sending every update by email, post key messages inside the client workspace. This gives everyone a shared record of what was said, what was shared, and what needs to happen next.
This works well for project updates, approval requests, onboarding instructions, account updates, and general client communication.
Step 6: Invite your client
When the portal is ready, invite your client.
Keep the invitation simple:
“Hi [Name], we’ve created a secure client portal for you. You can use it to access documents, upload files, view updates, and communicate with our team in one place.”
The easier you make the first login, the more likely clients are to use the portal.
If you are looking for a free portal read our guide to selecting one.
Step 7: Keep the portal updated
A portal only works if it stays current.
Make it part of your process to update files, post important messages, remove outdated documents, and keep folders organized.
A clean portal gives clients confidence. A messy portal creates the same problem as email, just in a different place.
When is a free DIY client portal enough?
A free DIY portal may be enough when your needs are very simple.
For example, Google Drive, Notion, or a basic template may work if:
- you only have one or two clients
- you only need to share a few files
- you do not need custom branding
- you do not handle sensitive information
- you do not need structured client communication
- you are not managing ongoing projects
- you do not need clear audit trails or access control
There is nothing wrong with starting simple.
But DIY systems often become harder to manage as your client base grows.
When should you use professional client portal software?
You should use professional client portal software when client work starts to feel scattered or risky.
That usually happens when:
- you manage multiple clients
- clients regularly send or request documents
- you need to control access and permissions
- you want your portal to look like your brand
- your team wastes time searching through emails
- you handle confidential files
- clients need regular updates
- you need a repeatable onboarding process
- you want clients to have one place for everything
At that stage, a portal is not just a convenience. It becomes part of how you deliver your service.
A simple client portal structure you can copy
Start with this structure:
Welcome
Add a short welcome message explaining how the portal works and what the client can find inside.
Documents
Store contracts, proposals, agreements, reports, and other important files.
Client uploads
Create a place where clients can upload files or send requested documents.
Project updates
Use this section for progress updates, timelines, milestones, and important announcements.
Conversations
Keep key client discussions connected to the workspace instead of spreading them across email threads.
Reports
Add monthly reports, performance updates, financial summaries, or project reviews.
Invoices and billing
Store invoices, payment-related documents, or account information if relevant.
Useful links
Add links to booking pages, help resources, forms, dashboards, or other tools your client may need.
This structure is simple, but it gives clients a clear place to start.
How to make clients actually use the portal
Creating the portal is only half the job.
You also need clients to use it.
Keep it simple
Do not overload the portal with too many folders or sections.
Clients should understand where to click within a few seconds.
Explain what belongs in the portal
Tell clients exactly what the portal is for.
For example:
“Please use this portal to access documents, upload requested files, and view project updates.”
Use it consistently
If your team keeps sending files by email, clients will keep using email.
To change the habit, make the portal the main place for documents, updates, approvals, and important communication.
Keep it organized
Remove outdated files. Use clear folder names. Keep important documents easy to find.
A well-organized portal encourages clients to come back.
Send clients there for important updates
When something important happens, add it to the portal.
Over time, clients will learn that the portal is the place to check first.
Create your own client portal with Clinked
You do not need to build a client portal from scratch.
With Clinked, you can create your own client portal during a 14-day free trial and see how it works for your business.
You can add your branding, create secure client workspaces, share files, manage communication, control access, and give your clients one organized place to work with you.
If you are currently relying on email threads, Google Drive folders, WhatsApp messages, spreadsheets, or shared links, a client portal can make your business feel more organized from day one.
Start your 14-day free trial with Clinked and create your own secure, branded client portal.


